Tuesday, April 19, 2011

Forbidden Fruit

It was like I found a box of gold! Technically, I did. For those of you who remember my posting about cactus pears, you will note that different varieties are available. (For my entry on cactus pears, click here).

Once in a while, in the grocery store, I've come across these yellow-green cactus pears and thought that they were too unripe to eat. Little did I know that they were actually the illusive golden prickly pears that I have been searching, for years, to find! These particular ones were from South Africa.

Unlike red cactus pears (the most commonly found variety), these fruit have a somewhat sweeter flavour, with hints of pineapple and banana. I also found that this variety was "pricklier" than other varieties, as I was left with some war wounds. (I'll do anything for a good meal and, yes, it was worth it!)

Another potentially wounding fruit, I was able to capture, is the loquat or nespoli. This orange fruit has the shape of a small pear and the taste of a mixture of apricots, plums and grapes.

This small fruit also has some parts to be aware of. As you can see, the center contains some seeds. Well, more than you think.

This little guy produced eight seeds. It is commonly known that this fruit is thought to contain approximately 30% waste. Another thing to know is that the seeds contain small amounts of cyanide (Life always comes with balance.) Apparently, they are comparable to apricot kernels, which also contain some amount of cyanide. So, some people advise not to consume, chew, or suck on, the seeds.

However, I have seen recipes where loquat seeds are saved and used in culinary purposes to provide a cherry-like flavour. I have seen recipes calling for loquat seeds to be stuffed in chicken and duck, as well as, used to flavour vodka.

Until a recognized case for "death by loquat seed" is found, I'm game for a try!

Tuesday, April 12, 2011

Snack Attack

Peanuts, a.k.a. groundnuts, make a healthy and satisfying snack. However, they do not always need to be roasted. In certain parts of the world, including the Caribbean, Africa and India, it is quite common to find snacking peanuts that have been boiled.

When preparing nuts in this manner, you need to purchase fresh, unroasted peanuts. I have been able to find peanuts of this variety in Asian supermarkets and in Chinatowns across the Greater Toronto Area. They are usually found in mesh packaging, as seen below. When in this form, feel free to keep them in the refrigerator until you need to use them. 

Wash the raw peanuts thoroughly under cold water. Place them in a pot, filled with heavily salted water and let them cook, under a gentle boil, for at least 30 mins to 1 hour. The longer they cook, the better they will taste.

The peanuts will be ready when the shells take on a slightly darker brown colour. 

The shells will also be extremely easy to pop open using your fingers.

These boiled peanuts make a healthy, tasty and addictive snack. They will be gone in no time (as you can see).

If you have any peanuts left over, you can leave them in the salted water. They should stay fresh for a few days. Simply bring the solution to a boil, for five minutes, twice a day to ensure optimal freshness. (This is the process they used before refrigeration.)

Thursday, April 7, 2011

La Tortilleria

I love Toronto for the fact that it can satisfy any culinary need. Yesterday, my craving-of-the-day was for tortillas and I don't mean the disc-like things you can pick up from the supermarket. Tortillas are a Latin American flat bread, normally made from a corn flour mixture called masa. All-corn versions are available, which are naturally gluten-free.


I visited a place in Kensington market called La Tortilleria (198 Augusta Avenue). There are a few locations of this shop within the Greater Toronto Area. In Spanish, the shop's name means tortilla bakery or tortilla shop. The shop sells old world style tortillas by weight. The stack below (approximately 1 kg) cost me $3.00 CAD. They were actually warm when I picked them up!


The bread keeps well, for approximately 2 to 3 weeks, in the refrigerator. Alternatively, they can be frozen. (They don't last that long at my place!)


As you can see, the bread is paper thin and is perfectly made for holding other ingredients. They have a rather simple corn flavour, which lends itself well for breakfast, lunch or dinner.


I decided to go simple and savory for dinner. I made a wrap with some frittata, caramelized onions and homemade mayonnaise.


For my recipe for frittata, click here.
For my recipe for homemade mayonnaise, click here.


The tortillas can also be baked, pan-fried or deep-fried. They are a definite must-try that will leave you feeling like you are in Mexico!

Wednesday, April 6, 2011

Olive Oil Mayonnaise

Who doesn't like mayonnaise? This creamy condiment is actually even better when it is homemade. Don't be intimidated. It is actually very easy to make.


I have made mayonnaise by hand before, but I decided to use my new toy instead. (Thank you Zia S. and Zio M. for the great gift of the KitchenAid stand mixer!)


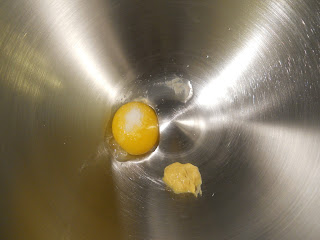
To make the mayonnaise, you will require one raw egg yolk. Many people are leery, with good reason, about using raw egg products. These products can harbour harmful Salmonella bacteria. However, my science background has come to good use. Salmonella, when present, is a usually found on the shells, as the hen can pass it down when laying her eggs. Eggs are normally cleaned thoroughly and washed before they get to the general market. However, as an added precaution, when I am using raw eggs, I like to place the egg in boiling water for approximately 45 seconds to make sure there are no harmful bacteria left.


To the egg yolk, add the following ingredients:
- a pinch of salt
- a small amount (between 1/8 and 1/4 teaspoon) mustard (Use the good stuff!)
- a few drops of vinegar (Any white or light vinegar will do. I used white balsamic.)


Give the base mixture a whirl, so that all of the ingredients are incorporated together.


Next, turn the mixer to the high setting. Slowly begin streaming olive oil into the whirling machine. The operative word is "slowly"! You want to be able to make a steady and thin stream of olive oil.


Also, be sure to use a high-grade, extra virgin olive oil. This mayonnaise is all about flavour and you will not get any from a wimpy oil.


Within no time, and instantly, the mixture will thicken. You will be left with fresh mayonnaise.


Use a rubber spatula to gather all of the mayonnaise and place it in a container for use. Be sure to place it in the fridge if you are not using it the same day.

The mayonnaise is wonderful and creamy by itself. However, you may want to infuse it with some additional flavour. For suggestions, try using:
- sun-dried tomatoes
- garlic
- lemon juice or lemon zest
- herbs including parsley, oregano, thyme, basil, or my favourite, rosemary

Tuesday, April 5, 2011

Orange Apricot Quinoa Cake

For those of you who have read this blog before, you will understand that using quinoa flour can be quite beneficial, because of its high protein content and the fact that it is gluten-free. I have been able to create quinoa muffins successfully, but sadly, I haven't been able to use this flour much for anything else. (For my recipe for Protein-Packed Quinoa Muffins, click here.)


The difficulty lies with the slightly bitter taste of the quinoa flour. With the muffins, I tried to mask the flavour. This time, I decided to work with it in order to make an Orange Apricot Quinoa Cake. (Thank you L.M. for help with deciding the flavour combinations!)


To make the cake, gather the following dry ingredients together in a mixing bowl:
1 cup quinoa flour
1/2 cup white rice flour
1/4 cup fine corn flour (not cornmeal)
1/2 cup golden-brown sugar (packed)
1 teaspoon baking powder
1/2 teaspoon baking soda


Now it's time to work in the flavours. I decided to use cloves. You will only need four.


Simply use a mortar and pestle to grind them into a fine powder.


I also decided to use the zest of an orange. Make sure not to get any of the pith (the spongy, white section between the skin and the fruit), as it can add some unnecessary bitterness. Add the orange zest and ground cloves to the dry ingredients.


Complementary flavours can also be added when incorporating the wet ingredients. To do this, I decided to add the following:
1/4 cup Grand Marnier (an orange flavoured liquor)
2 heaping tablespoons of apricot jam


Dissolve the two together in a separate container before adding it to the mixture.


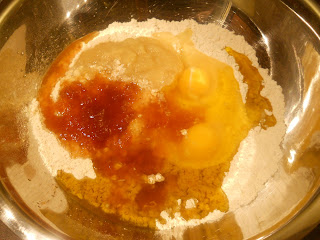
Now add the rest of the wet ingredients:
2 large eggs
1/3 cup olive oil
1 container PC "Just Apples" (100 mL crushed apples)


Combine the wet and dry ingredients together until it creates a smooth batter.


Place the cake batter into a greased cake tin and place it in a 350° F oven, for approximately 30 minutes, or until you can place a toothpick in the centre of cake and it comes out clean.


The cake should have risen and taken on a golden brown colour.


After letting it cool slightly, transfer it to a plate.


The combination of the colves, orange zest, Grand Marnier and apricot jam is incredible!


Next time, I hope to make two cakes, layer them on top of each other and  frost them with something equally as yummy. I just have to figure out a dairy-free topping that will work. I am open to suggestions!