Thursday, September 30, 2010

Delicious Dandelion Soup

This posting is a follow-up to a comment I received requesting a recipe for dandelion soup. (To view my entry regarding dandelions, please click here.)  After doing some extensive research, I could not find a recipe to my liking.  So, I created my own.

Firstly, I will show you how to prepare the dandelion greens for cooking.

I purchased this a bunch of dandelion greens in my local supermarket.  They are approximately 1 1/2 feet in length, from top to bottom.


Chop off the bottom last inch and discard.


Proceeded to cut the greens, up the stalk, in one-inch segments.  Your pieces can easily be cleaned by using a salad spinner, as seen below. 


Place the dandelion greens in the salad spinner and fill with water. Swoosh around (this is the actual technical term) the leaves and stems and you will find that the dirt will fall to the bottom.  Drain the water and presto, you have cleaned greens ready for use.


On to the recipe!

Ingredients:
- dandelion greens (cleaned and chopped)
- 3 tablespoons of olive oil
- peperoncini/chili flakes (to taste)


- a handful of green marinated olives
- 1 medium onion (roughly chopped)
- 5 large cloves of garlic (roughly minced)
- 3 fillets of milk-fed veal scallopine/cutlets (cut, against the grain, in small strips)
- approximately 4 tablespoons of balsamic vinegar
- approximately 3-4 cups of hot water
- 1 tin of tomato paste (156 mL)
- 1 tablespoon of German mustard (I prefer the taste and quality of this type of mustard)
- 2 tablespoons of paprika
- 2 tablespoons of dried oregano
- salt (to taste)
- fresh ground black pepper (to taste)

Method:
In a large pot, and using high heat, pour in the olive oil.  To it, add the peperoncini and the marinated olives.

As you can see, the olives I used contained pits.


I simply removed the pits with a cherry pitter and gave them a rough chop. Adding olives, in this method, at the beginning of recipes, can add a great amount of flavour.


Continue to add to the chopped onion and cook them until they turn a tan colour. Now add in the minced garlic. Your mixture should look like this:


At this point, add in your milk-fed veal and pour the balsamic vinegar over it.

As you can see, I cut the veal against the grain in small strips, so that it cooks quickly and for it to provide maximum flavour to the soup.  I used milk-fed veal, because I believe is the better product, both in taste and quality.


Once the meat has browned, it will look like this:


Now add the following:
hot water
- tomato paste
- German mustard
- paprika
- dried oregano
- salt
- fresh ground black pepper

Stir to combine the ingredients. Your soup base should look like the following picture:


Place your cut dandelion greens directly on top of the liquid and cover.


Through the cooking process, the greens will automatically wilt and release water. There is no need to stir. Simmer the soup until your dandelion greens are tender.

Yum.


Thanks for the comment and the request! Keep reading and keep cooking!

Wednesday, September 29, 2010

Crude, but Not Rude

Bresaola is Italy's answer to my prayers. It is cured beef that originates in northern Italy and, apparently, is the closest you can get to prosciutto without being pork.


The bresaola found in Canada is a slightly more salted and firmer version than the ones found in Italy. Nonetheless, it is absolutely delicious.


However, finding it is often a problem.  I have found that even most Ital-Canadians do not know what it is. Walk into most delis to request this meat and the reply would be, "Huh? You want brisket?"


To make your lives easier, below is a list of places you can purchase bresaola in and around the Greater Toronto Area:
- Grande Cheese (any location)
- Pusateri's (Avenue and Lawrence or in Yorkville)
- La Salumeria (Yonge and Davisville)
- St. Lawrence Market


Hint: Make sure you order the bresaola sliced paper thin.  The fillets should almost be translucent.


In Italy, this cured meat is served with arugula/rocket, parmigiano reggiano, olive oil and lemon juice. Here are some other ways to enjoy this flavourful deli meat:
- in a sandwich
- shredded in a salad
- combined with melon (e.g. honeydew, canary melon or cantaloupe)
- used in replacement in recipes calling for prosciutto

Tuesday, September 28, 2010

Move over Philly

Who doesn't like cream cheese?  However, since I've been really looking at what I put into my body, I have been drawn to reviewing ingredient labels for even common products. I have noticed that commercially-produced cream cheeses contain many additives that are undesirable.

I have discovered an easy method of making labneh, a Middle Eastern yoghurt cheese. This type of cheese is simply made by straining yoghurt.

Yoghurt is a dairy product that is readily available in supermarkets. It is produced by the bacterial fermentation of milk.  Here is some great information about yoghurt:
- People who are lactose intolerant may be able to digest yoghurt, as most of the lactose (sugars found in milk) have already been broken down by bacteria
- Yoghurt helps in digestion
- All types of yoghurt contain beneficial bacteria
- Yoghurt can be used to marinate/tenderize meats (as in tandoori chicken)
- Beverages can be made from it (e.g. Indian lassi, smoothies, etc.)
- It is a great source of protein and calcium

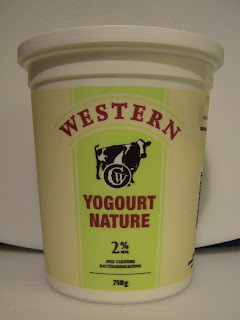
When using yoghurt, in this recipe or in others, I would suggest purchasing ones that are made without the use of additives, i.e. gelatin, colours, sugars, artificial sweeteners, gums, etc.  Simple and plain versions are usually found in the form of Balkan-style or Greek-style yoghurt and contain only milk (and/or cream) and bacterial culture.  I have found that Western, a dairy company, makes a great product (as well as many other dairy products not containing additives).


Making Your Cream Cheese:
Begin with lining a colander or sieve with paper towel.  You can also use cheesecloth, a coffee filter or a clean dishcloth for this process.  Fill your lined container with yoghurt and put it in a place where the liquid can drain.


During this process, you are simply separating the curds (solids) from the whey (liquid). This liquid contains dissolved proteins. If you decide to keep the whey, produced in cheese-making, try to use it in these ways to boost the protein content in your meals:
- use it to soak beans
- add some to the water when boiling pasta
- pour some in a smoothie or shake instead of protein powder
- substitute for water in recipes for muffins, cakes and breads

If you have decided not to keep the whey, I would suggest that you let the yoghurt strain in/over a sink.  You may also want to cover the yoghurt, so nothing gets into it.


After waiting approximately 4-7 hours, your cream cheese will be ready.  Don't worry if you forget about it.  You can keep it out for up to 24 hours.

Hint: I usually let my yoghurt strain overnight, so that I can have fresh cream cheese in the morning.


Suggestions for use:
- spread on a plate and top with olive oil and sea salt, for a savory dip
- use it to make tzatziki by whipping it with garlic and salt
- combined with fresh or dried fruit
- spread it on breads, bagels, croissants, etc.
- combine it with syrup or jam
- spread it on top of pancakes or omelettes
- drizzle some honey on top and have it as a sweet snack

Bonus: Your cream cheese will last upwards to a month in the refrigerator.

I am sure that you will find some great uses for this versatile cheese in your cuisine!


Hold on! You can make sour cream too!

Western also carries a product called Maslanka.


It is an Eastern European fermented yoghurt. I am not a fan of the Maslanka on its own. However, follow the same directions above, for straining yoghurt, and you will be left with an amazingly thick and flavourful sour cream. Yum!


Monday, September 27, 2010

Some Like It Hot

Hot peppers (including chilies) have been used as a staple, by heat-seekers and spice enthusiasts, to give a kick to bland food.  The chemical composition in peppers, which give them their characteristic heat, is also known to boost one's metabolism.  If you like to "bring it up a notch", below are two great ideas to give your food a needed zing.

Chili Pepper Vodka:
Dried chilies can be soaked in vodka to infuse the alcohol with a peppery flavour.  Simply take whole dried red chilies and place them in a sterilized preserving jar.  Fill the jar with vodka and wait.


Within time, the vodka will start to acquire the colour and, more importantly, the flavour of the chilies, as seen below.


The concoction will last years in your pantry.

Suggestions for use:
- make a penne à la vodka with a kick
- add to a tomato sauce when cooking meat/meatballs to give a snappy undertone
- used as a zesty replacement for other alcohols when cooking meals
- make a racy Bloody Caesar or Bloody Mary for those people who ask for their drinks "extra spicy"


Another ingredient that I have discovered is the purple ornamental pepper.  These peppers plants are usually found in garden shops and are used to decorate homes and gardens alike.  After doing some research, I have found that the 1/2"-1" purple hotties are edible and also pack quite a punch.


I decided to create a cold infusion in olive oil.  A cold infusion simply means no heat is necessary in the preparation.  This method of infusing olive oil with additional flavours can be used with a number of other ingredients including: garlic, rosemary, oregano, sun-dried tomatoes, etc.

Simply chop your peppers and place them in a sterilized jar.

Attention: Chopping peppers releases oils that can leave a burning sensation on your hands. Never touch your eyes or any other sensitive glands after handling peppers.

Tips:
- use vinyl or latex gloves when chopping peppers to prevent skin exposure
- hold the stem of the pepper and cut them using kitchen shears/scissors, directly into the container you want them in, to avoid burns
- if your hands start burning after chopping peppers, rinse them with rubbing alcohol to dissolve the oils, released from the peppers, then continue to wash with soap and warm water


After the peppers have been chopped, fill the jar with olive oil and seal the lid. Again, waiting is necessary. Since the peppers are raw and fresh in this process, you may want to keep the oil in the fridge. Note, olive oil will get cloudy and may congeal when cold. Do not worry, it will become clear again once the oil reaches room temperature.


Suggestions for use:
- drizzle on pizza to add some authority
- add some fire to a bland sandwich
- spice up a salad
- trickle a little over pasta or a lasagna to make your lips tingle
- make a peppery chutney
- give a smack to Chinese food
- add some excitement to a curry

Friday, September 24, 2010

My Hips Don't Lie

Flowers, both domesticated and wild, are readily available throughout Canada. It is amazing the  variety, species, colors and shapes that are available in this country.


However, few people realize that many of these flowers are actually edible and some even have medicinal properties. An example of such a flower is in rose.


 Wild Rose

Wild rose and even garden rose petals can be eaten.  They have been used in many cultures to produce items such as rosewater, preserves and jams. These flowers have been traditionally used to remedy stomach ailments. The petals can also be used in a number of ways including:
- additions to salads
- garnishes
- frozen decorations in ice cubes
- floated in punches
- giving a kick to desserts (e.g. ice creams)

Ingredient Alert: The rose flower is not the only part of the plant that can be used!  Rose plants produce fruit called hips, that replace the flowers in the autumn.


When ripe, rose hips turn a bright red colour, similar to crab apples.  Rose hips are a very high source of vitamin C.  The best time to harvest rose hips is after the first frost. Use them whole to make tea, or to flavour jams and jellies.


Another common edible flower is the dandelion.


Dandelions have been used for generations as a herb. Both the slightly bitter leaves and yellow flower petals can be eaten raw in salads. The leaves can also be sautéed, with a little olive oil and sea salt, and eaten as a side dish.  The roots can be washed thoroughly and roasted to make a caffeine-free coffee substitute.  The the roasted roots can also be used in combination with coffee to augment the taste.


Flavour Enhancing Idea: Sprinkle some dandelion flower petals on hot, savory fritters to give them a boost of flavour and an addition of colour.


Commercial Availability: I have been able to buy dandelion leaves at many local supermarkets throughout the Greater Toronto Area.


A relation to the dandelion is the common chicory.


Chicory can be used in the exact same manner as the dandelion. Both chicory and dandelion have been used in traditional medicines to treat the liver.


Warning: Know Your Source!
- NEVER ingest plants that have been treated with pesticides, herbicides, insecticides or any other chemicals
NEVER harvest flowers or plants growing by the roadside
- ALWAYS identify the flower or plant and eat only the edible parts of those plants
- Be very sure of the plant's identification. If you are not entirely sure that a plant is edible, do not eat it!

Thursday, September 23, 2010

It's Not a Quince-cidence

Quince are very firm, bright yellow fruit that you have probably seen in your supermarket. They are related to apples and pears and it is even believed that the apple, in the story of Adam and Eve, was actually a quince. (Somehow, referring to a man's "Adam's Quince" doesn't feel right.)


Most quince are extremely hard and have a sour/astringent flavour, not lending well to eating raw.  However, I have found that if they are cut thinly and small, they make a great addition to fruit salad.

Quince are quite frost resistant and will remain fresh and usable in your refrigerator for weeks.

You may find quince in a preserved form, usually in syrup. Through my experience, the fruit in this form is flavourful, but is not very appealing in its consistency or appearance.

The Solution: Easy Quince Preserve
Often, the problem with making preserves is that you have to make a massive amount, which takes a great deal of your time and tests your patience. Follow the directions below to make a delicious jar of homemade quince preserve. (That's right, only one jar!)

- Begin with peeling 3 quince
- Shred the the fruit, using a cheese grater or similar appliance, directly into a small sized pot
- Add one 100 mL container of PC Unsweetened “Just Apples” (By the way, I love this product. It contains no artificial flavours or colors and an organic variety is also available.)
- Add the following ingredients:
       - vanilla sugar* (as much as is required, depending on the sweetness
         of the fruit and your taste)
       - honey (same as previous comment above)
       - water (you may need to add water, throughout the process, if the mixture
         thickens too much for your liking or if the fruit requires more cooking)
       - 3 rounded teaspoons of fruit pectin
       - a dash of ground cinnamon

* If you don't want to use vanilla sugar, use regular white sugar and add a teaspoon of vanilla extract.  I would suggest not using vanilla essence (artificial vanilla flavouring), as nothing beats the real thing!

Simmer the mixture until the fruit is cooked.  Jar and you're done!  The directions above yields approximately one 500 mL jar.


Sidebar:  To make your own vanilla sugar, you basically put some granulated white sugar in a jar with a vanilla bean. You can either insert the bean whole or cut it into multiple pieces and leave it in a cupboard for use whenever you need. The natural oils and scent of the vanilla bean will permeate into the sugar et voilà, you have vanilla sugar. It lasts forever and a day. Note, separate out the bits of bean before using the sugar.


Suggestions for use:
- replace regular sugar in recipes for cakes, pies, etc.
- use it for sweetening coffee, tea or other drinks
- make jars of vanilla sugar for people as a great (and inexpensive) homemade gift

Wednesday, September 22, 2010

Let Your Love for Food "Blossom"

Seen below are zucchini flowers; more appropriately, zucchini blossoms. They are a delicate ingredient used in Mediterranean cooking.


Many people grow zucchini in their gardens and, often, do not know that the large yellow flowers can be eaten. The zucchini or courgette, as it is known as in other parts of the world, is type of squash.  "Zucca" in Italian or "courge" in French means squash or pumpkin.  Therefore, zucchini and courgette both translate to "little squash".

Availability:
The zucchini plant grows quite well throughout the spring, summer and autumn in Southern Ontario. The flowers are produced throughout the season.

If you do not have a garden available, I have been able to buy squash flowers from the following places in the Greater Toronto Area:
- farmers markets (e.g. at Metro Hall)
- Chinatown (not in the stores, but from the ladies on the street who sell products from their gardens)
- some grocery stores catering to Italian patrons carry them (depending on availability and demand)

Tips:
1) Don't be afraid to trim any large or dead leaves from the outside of your zucchini plant. Trimming has proven well for me, as one year I was able to cultivate zucchini flowers up until mid-October.

2) Please note that all squash blossoms are edible and can be used instead of zucchini blossoms.

3) When picking squash blossoms, do so only in the morning when the flowers are open. Flower-loving insects, including beetles and bees, love the environment and often become entrapped when the flowers close later in the day.

Cleaning:
When cleaning the yellow blossoms, wash them thoroughly inside and out.  Make sure they dry well, especially if you decide to fry them.  Not doing so will cause your oil to splash and sputter, potentially creating a cooking/burn hazard (I speak from experience).

Remove the bottom ends of the flowers, by pinching gently. The stamen/pistol should remove easily.  Also, remove the slender needle-like leaves at the base of the flowers. Please see below for picture.


Once clean and dry, they are ready for use.


Traditional Recipe: Zucchini Blossom Fritters
- Create a simple batter by combining approximately 1/2 - 3/4 cup of white flour, one egg, a pinch of salt and water
- The batter should be the consistency of pancake batter
- Coat your cleaned zucchini blossoms with a small amount of batter
- Fry* in a skillet, using a medium to high heat, until golden brown

*For optimal flavour, I have found that the best oil to use is an unrefined sunflower oil.  This oil is not chemically processed in any way and, as you can see below, it has a bright golden colour.  The taste is nutty, exactly like the sunflower seeds it is made from.  I buy this type of oil at a local Russian market in North York, Ontario.  Similar markets catering to Eastern Europeans have many comparable products.


Example of unrefined sunflower oil

Variations for Zucchini Blossom Fritters:
- stuff the blossoms with ricotta cheese
- stuff the blossoms with either a piece of mozzarella cheese or an anchovy, or both
- add Romano or Parmesan cheese to the batter
- use sparkling water instead of still water, in your batter, to make the coating crispy
- use cold water or keep the batter cold with ice, as an alternative way to make the coating crispy
- add a small amount of baking powder to the batter to make the coating fluffy
- use white wine or sparkling wine in the batter to add a little "je ne sais quoi"
- omit the egg for a vegan-friendly option

Here are some other uses for this ingredient:
- add a layer of zucchini blossoms to a vegetable lasagna
- make a zucchini blossom frittata or omelette
- use the flowers as a pizza topping
- mulch the blossoms, as seen below, and add to a soup or stew


Whoa!  Hidden Ingredient Alert!  Two Ingredients in One!

Do not throw away any stems or buds.  These parts of the plant are also edible and, by the way, taste amazing!  Chop up any light green, tender stems, buds, and leaves and add them to a soup, stew or chili.  Only use very small leaves, up to the size of a nickel. These parts of the plant are traditionally used at the end of the growing season and added to the best tasting minestrone you will ever try. If you cannot use the stems, etc. right away, they freeze very well.

Tuesday, September 21, 2010

Panisse de Nice

Panisse.  What is it?...Cheese?...Bread?...A hat?


Actually, it is a specialty product from the South of France.

Sidebar:  Provence is one of my favorite places in the world; not just because of its unbelievable beauty, but because of its amazing food (mais bein sur)!  Imagine the best Italian food you've ever had.  Now, add butter and cream.  How could it not taste good?

Panisse is actually a chickpea (garbanzo bean) cake that was once called a poor man's food.  These moist patties can be bought at butchers, delis, fromageries and fresh pasta places in Nice.

Once bought, the panisse can be sliced or cubed and fried in olive oil.


After frying, all you need is a sprinkle of sea salt.  No condiments required.

Warning: They go fast!

Texture:  Once cooked, the panisse is crispy on the outside and creamy on the inside. Imagine crisp golden French fries, that when you bite into them, the inside is filled with creamed potatoes.  C'est incroyable!

If anyone is aware of a place one can find panisse in the Greater Toronto Area, please leave a comment.


*** Update: To view my recipe and make your own panisse, click here. ***

Monday, September 20, 2010

Fierce Fresh Figs

Fiber is your friend. Especially, when they taste like these babies!


Juicy and sweet, fresh figs can be an amazing part of your diet. Figs come in a variety of shapes, sizes and colours and they all taste quite different.  So, you may need to try a few varieties.


You honestly don't need to do much with them, except wash. Feel free to eat every part of the fruit except the stem. When they are ripe, the interior has the texture and taste of fresh jam.

Incredible food idea: Fig Pizza
- Bake a thin crust pizza dough with some olive oil brushed on top
- Once ready, top with fresh sliced figs, shaved parmigiano reggiano, and arugula or rocket
- Drizzle some honey on top
- Prepare to eat the entire thing


Another type of "fig" is the cactus pear, also known as "fichi d'india" or Indian Figs. 


They are also known by other names including prickly pears and, in an East Indian dialect, hathla.  The word hathla is derived from hath, meaning hand. As you can see, they grow on the ends of cacti resembling hands.


I would describe the flavor of this fruit as an intense watermelon. The fruit contains many small hard seeds, which should be eaten, but not chewed.  You will be able to tell if the fichi d'india is mature and ready to eat by pressing slightly on the exterior. It should give a little. Be very careful when handling this fruit, as it truly is "prickly".


Preparing:
As shown in the photo below, you can save yourself a lot of grief by peeling the fruit by slicing off both ends, scoring the skin and peeling back the thick exterior to reveal the red or yellow meat. 


Slice and serve by itself or with a medley of fruits.